Note: This guide is intended for use with version 3.3 of Plotly On-Premise.
In Part I of the tutorial, we created and configured an Azure VM. We then installed Dash Enterprise on the Azure VM. Finally, we configured Dash Enterprise and verified that our hostname pointed to the Azure VM’s public IP address.
We proceeded with a Self-Signed SSL Certificate to easily create a testing production environment for this tutorial. In Part II of the tutorial, we continue our introduction to Dash Enterprise by deploying a machine learning application available from the Dash Gallery.
Initialization on App Manager
Within the Plotly On-Premise Server Manager, either clicking on Open while accessing the Dashboard view or copy pasting the URL provided for the Dash server located in Settings should load the App Manager portal.
The first time you attempt to load the App Manager portal page, you’ll likely be prompted to accept the self-signed SSL certificate you have created, and provide the administrator credentials as seen in the Settings page.
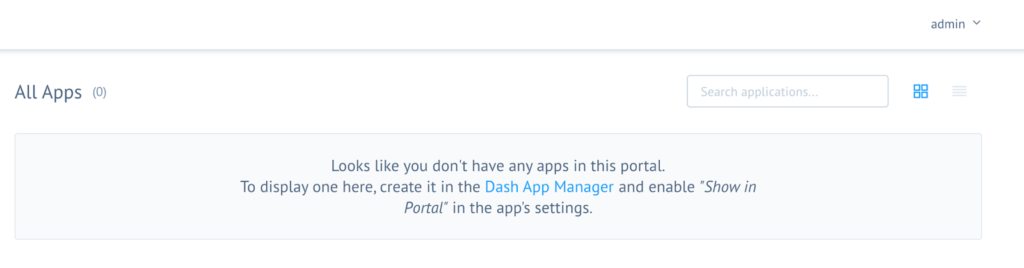
Before we deploy an application, we’ll need to initialize it so that a local repository is set up and ready to receive the app via git push. Navigate to App Manager and click the blue Initialize App at upper right, as seen in Figure 21 below.

Figure 21: Initializing your first Dash for R application
Warning message above can be safely ignored using SSH connection for the purpose of this tutorial. However, we need to note that, holding a recognized Certificate for HTTPS communication is crucial for the production environment.
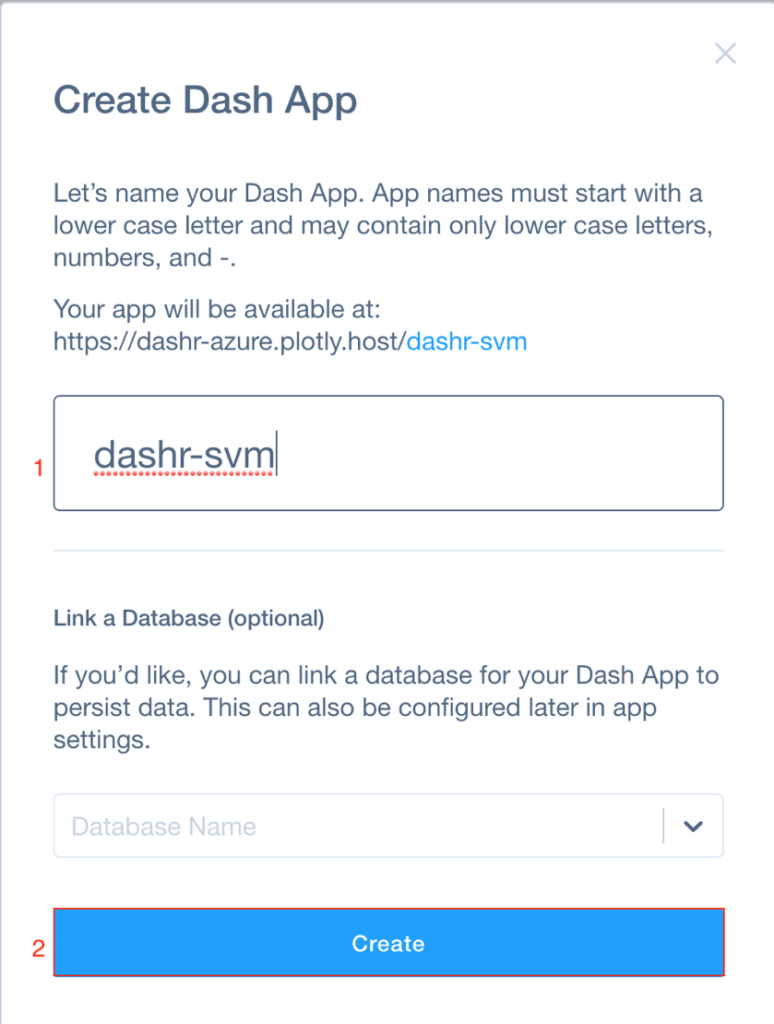
For the purposes of this tutorial, we’ll ignore the message about the self-signed certificate which appears — in a production environment, you’ll want to use an appropriate, recognized SSL certificate to secure web traffic to and from the portal.Next, we’ll want to enter a name for the app we’re initializing. Fill in the name field, then click the blue Create button seen in Figure 22 below. For future reference, note that you may also optionally link a database in the same configuration pane.
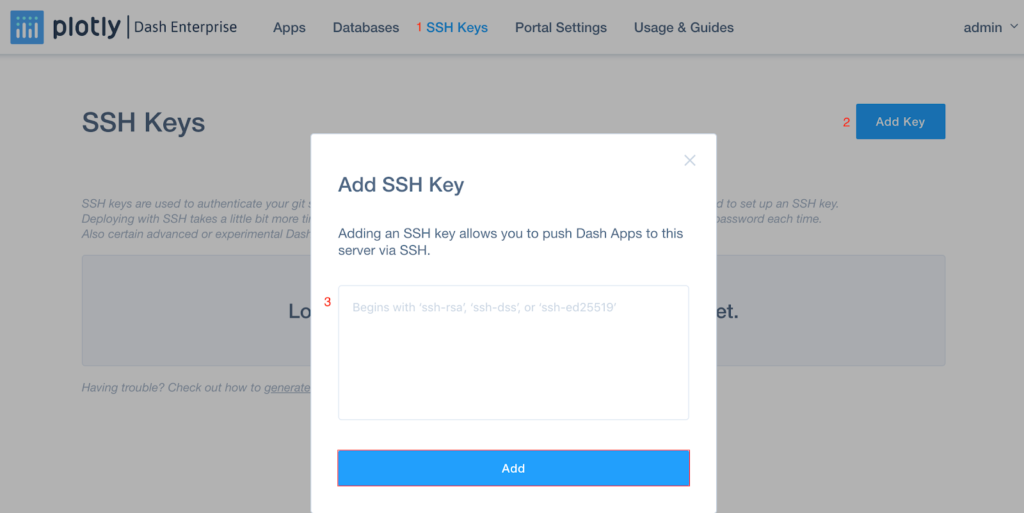
Adding your SSH key to App Manager
Prior to pushing code to the repository we’ve just created by initializing our Dash app, it can be convenient to add our SSH public key to the App Manager via the SSH Keys menu at the top of the window. We’ll reuse the SSH key we created earlier to access our Azure VM.
Configuring your local environment for deployment
We’re almost ready to deploy our Dash app for the first time! There are just a couple brief steps which remain; we’ll need to return to the command line interface (CLI) to continue. Don’t worry, it’s straightforward and we’ll walk you through it here.
First, download the application from its GitHub repository by cloning it:
$ git clone git@github.com:plotly/dashr-svm
Next, we’ll need to change directories:
$ cd dashr-svm
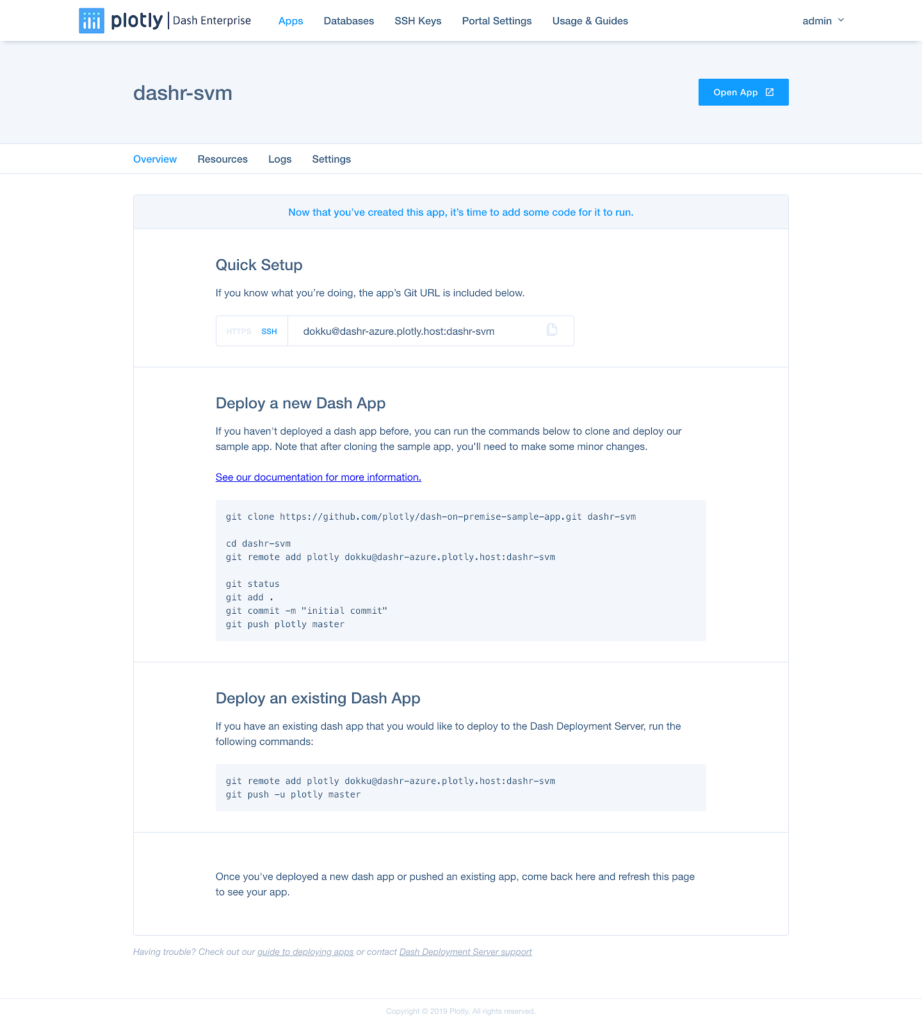
The App Manager UI provides instructions on how to configure Git so that it’s able to locate our remote repository on the host:

Figure 25: App Manager Instructions for SSH Configuration
Now we need to add the remote repository:
$ git remote add plotly [dokku@dashr-azure.plotly.host:3022]:dashr-svm
We can confirm that our repository settings are properly configured by retrieving the list of Git remotes:
$ git remote –v
Typing the above command will result in:

Preparing Application Files
We’ve reached the final step prior to “pushing” our code to the remote repository on the Dash Enterprise server. It’s always a good idea to ensure that everything is in place before we attempt to deploy our application, to help avoid potential complications.
The files below will be the same for all Dash for R applications deployed via Dash Enterprise. You won’t need to edit any of these for the purposes of this tutorial, since the dashr-svm repo contains everything you need to get started right away.
This information is just for reference; feel free to skip over what’s described below.
.buildpacks
The (hidden) .buildpacks file defines which buildpack should be used for deployment. In this tutorial, we assume you’re running version 3.3 of Plotly On-Premise. The underlying OS version for this product is 18.04, which also matches that of the heroku-18 “stack”.
We recommend using our fork of Chris Stefano’s R buildpack, which will retrieve version 3.6.1 of R and all the packages required to quickly deploy your Dash app: https://github.com/plotly/heroku-buildpack-r#heroku-18
Procfile
When the app is deployed, a Docker container is initialized within the VM. Within this container, there’s a folder named app which contains the files required to start your Dash application. The Procfile tells the server where to find the script which launches your app. In most cases, it should look something like this:
web: R -f app/app.R
app.R
This file contains the application code which launches the Dash server. While you can provide absolute paths to application resources, it might be easier to invoke setwd() and provide it the application path at the top of your app.R:
setwd("/app")
init.R
This file describes the R packages and options required to run your Dash application. You’ll want to add any R dependencies your app has here.
Deploying the Application
OK, we’re ready to push our Dash app! Since this is the first commit, we can use Git shorthand to add all the files in our directory (since they’re all new to Git), and then we’ll commit them with a comment:
git add .
git commit -m "Added App Files"
The commits are now “staged”, but need to be uploaded (pushed) to the remote repository. We’ll want to provide the remote name (“plotly”), followed by the branch name.
Here we go!
git push plotly master
Assuming our deployment was successful, we’ll see a message like the one below in Figure 26:
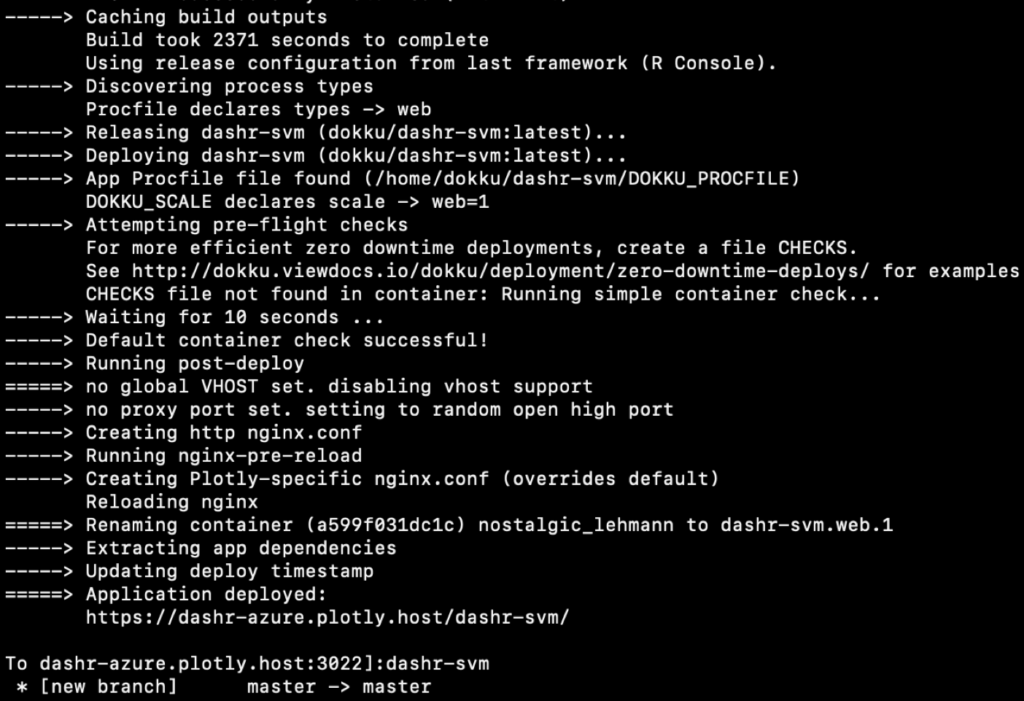
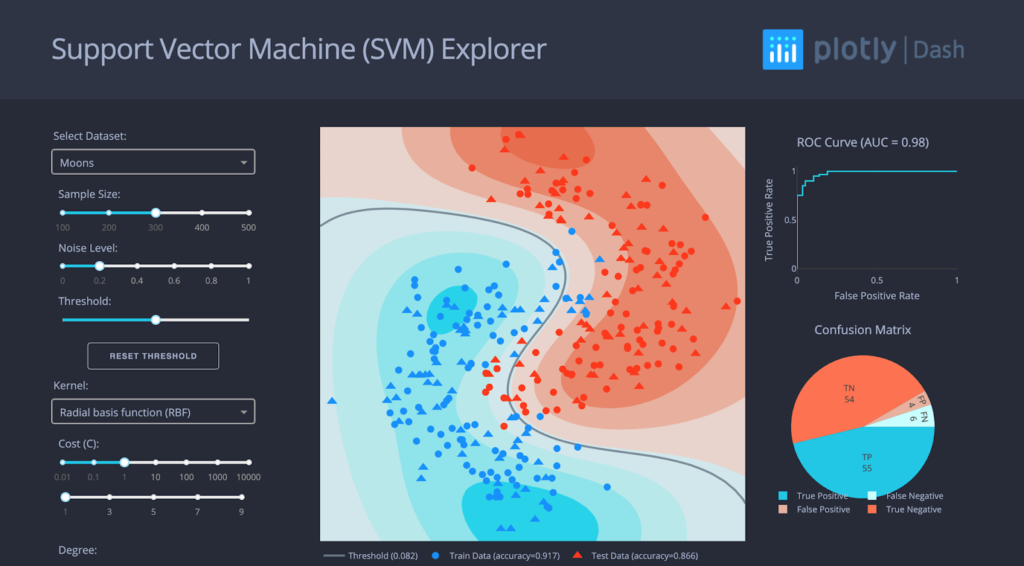
Using the URL provided above next to Application deployed:, navigate to the app in your browser. Once you’ve authenticated (assuming your app isn’t configured to be publicly accessible within the App Manager) and accepted the SSL certificate, the application which appears should resemble Figure 27:
Congratulations, you successfully configured a Dash Enterprise server within Microsoft Azure and deployed a machine learning app! Let’s recap what we accomplished in this tutorial:
- We selected a Microsoft Azure virtual machine ready for use with Dash Enterprise
- We provisioned and configured the VM
- We installed Dash Enterprise on the VM
- We successfully deployed a machine learning application written using Dash for R
We hope you’re as excited as we are about harnessing the power of analytics in R using Dash and Microsoft Azure. If you’re ready to take the next step, click here to learn more about Dash and Plotly’s enterprise product offerings.